


Adding links and images t your web page!
SLVIKI
6:37 AM
0

Adding links and images is another important thing in making web pages. We use links to guide the viewer to different pages. And we can use images to make the web page more detail and beautiful.
so from this blog post I'll talk about how to create a link and how to add an image for your web page.
First lets talk about how to make a link in your web page. To make a link we use the anchor element("<a>"). inside the anchor element we use an attribute named "href". this attribute is the one who tells the anchor element the destination for the link. The destination will be anything on the web.
So, now lets look at an example code of adding a link to a web page.
you can add this syntax inside the code to add a link,
<a href="link address">Link description</a>

And the output will be like this. when you click in the link it'll direct you to the appropriate destination.
And another thing is you can link within the page. this is an example code about that

And the output will be like this

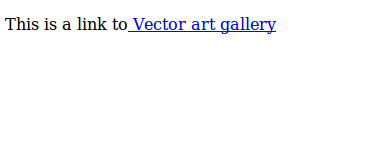
Think that if you want to open the link in the 1st code in a new window, In order to do that you only have to make a little change to the above 1st code like this
<p>This is a link to<a href="http://www.vectorartgal.blogspot.com/" target="_blank"> Vector art gallery</a></p>
after you make the change when you click that link it will open the vector art gallery blog in a new window.
Ok, now lets talk about adding an image to a web page,
the syntax to add an Image will be as following,
<img src="img address">
this image adding code also don't have a closing tag. it's a single tab element.
So this is a sample code of adding an image to your web page.

And the output will be like this,

So this is all for this tutorial lets meet again with another part in html5.


No comments